Custom Poses and Animations
This guide shows you how you can import your own poses and animations from Blender to Cyberpunk 2077. Please note that this guide does NOT use REDmod so tutorials for that are irrelevant here.
Why no redmod?
- currently no hand or toe bones
- only male average skeleton, making poses on femV ugly
- Wkit method allows all skels to be used, including animals, player, probably vehicles albeit i didn't test the latter
All of this is based on a brief explanation of his toolset that HitmanHimself posted. Yes, we could have been modding poses and anims since 13.03.2022, hopefully you feel as dumb as I did when I found out. Bless HitmanHimself for creating a great importer that actually works if used correctly.
Here you will learn how to use it correctly :)
For that you need the following:
My base models set up in blender
My edited gltf blender importer/exporter (don't come at me with bugs if you don't use it. It changes default settings to the ones that 100% confirmed work with the above blender version)
Edited Photomode containers by Zwei (removed feet ik snap causing ugly messes)
In this tutorial I show the process for static PhotoMode poses. The exact same workflow works for full animated...animations too! DO NOTE that player animations vary from NPC animations. Extra steps for that are needed, I may delve into that at a later date. This guide is aimed for beginners.
1. Make a Wkit project and choose a file where you want to add or replace an animation. The Anim importer only goes by names, so you can technically expand existing anims files with new entries. For this guide, we will however simply replace a PhotoMode pose with a custom one.
Here i will use the femV photomode idle pose container and replace the track idle___talk_to_the_hand.

Which is this pose ingame:

Export the container you want to place your anim in so you have a glb path easily for later:

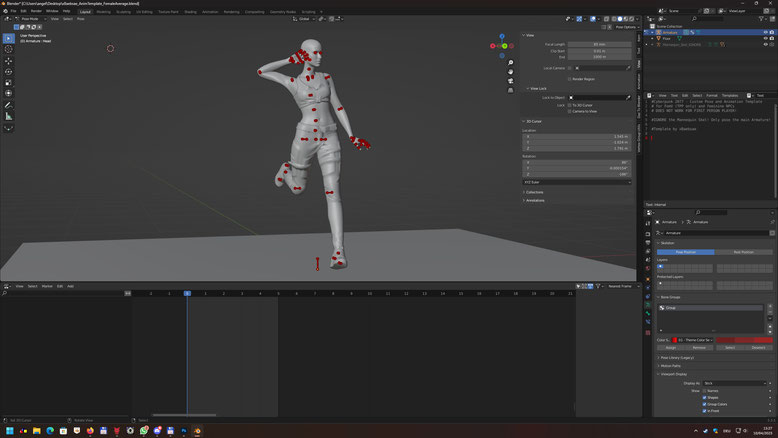
2. Open the Blender Template I linked above, select Armature and go into Pose mode. These bases save yourself from mistakes during posing a little bit. Some joints like elbows, knees and fingers are limited to only rotate into one direction because that is how it is IRL. Unnatural poses may turn into an ugly mess ingame, sometimes breaking look-at functions by deforming the legs weirdly etc. So I suggest you keep these limitations on.
Now you can pose away. Some useful pose mode controls are r, axis for eg if you type r x it will rotate the bone only on the x axis of the scene. Even more useful is r axisaxis (for eg r xx) which will turn the bone on its local/own x axis.
Here's a shitty test pose i created. Shoulders and joints will often look worse in Blender than ingame, this is because of the deformations that get applied dynamically which are not part of the animation rig.
3. Switch the downside view to the Timeline if it isn't already:

And make sure the marker is placed at the frame 0. Then hover over the 3d view where your model is and select all bones in pose mode. Press ctrl+I and choose Whole Character. Now you have created a keyframe with your pose!
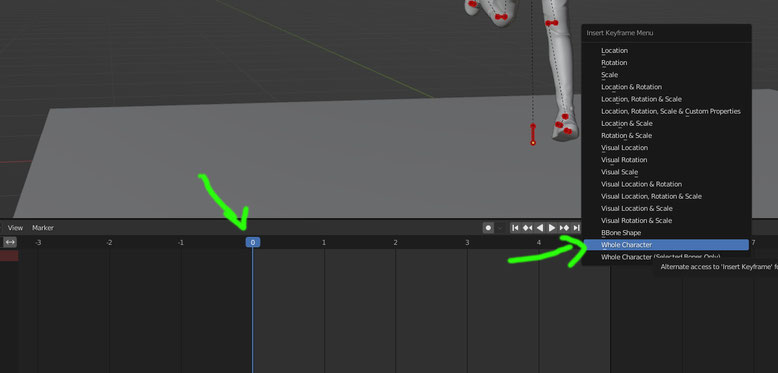
For safety I always repeat this two times so it turns into a 3 Frame ''animation''. On actual animated stuff you don't do this.

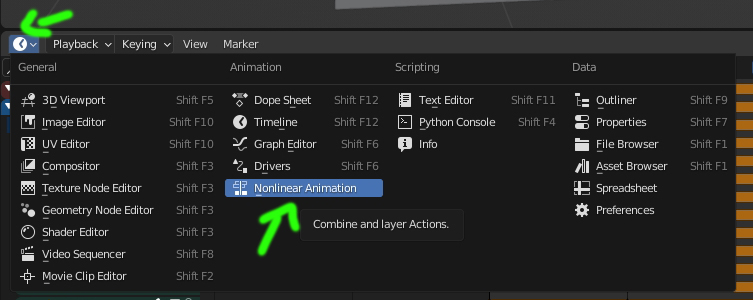
4. Now switch to the Nonlinear Animation tab (NLA). It will show you this and you have to click the small marked button to make your current timeline action a NLA track.
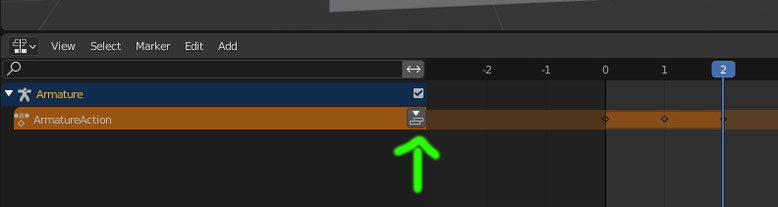
Copy the name of the animation track you want to replace/add inside an anim container. Here it is still idle___talk_to_the_hand. Paste it into these two places!

To get this result:

(Click images to enlarge)
5. Switch your Armature to Object mode and do File>Export>Angy Cyberpunk gltf. Overwrite the original poses file gltf here.


6. Simply switch your Wkit glb importer to Anims and import it.

7. Pack your project and wooop there's your new pose!

The following only concerns animated stuff!
8. The wkit importer somehow imports more frames than your anim has. For this shitty test animation i used one that has 21 frames in Blender. Wkit turns it into 24 for some reason and it will lead to random explosions ingame. You can easily fix this by changing the frame number here:

One remaining thing I could not figure out yet is why custom anims don't immediately start on NPCs spawned with AMM. They will only load if triggered either through its anim poses menu or if you spawn the character as companion. Either way, anims work, go nuts!

Yeah i know a masterpiece lmao but trust me it looks the exact same in Blender
Anyway, enjoy, hope it works for you!
- Angy | xBaebsae