Reshaping Heads for OCs
Requirements:
Extracted game files via LSLib by Norbyte
Blender (3.6 is used)
A correctly installed DOS2/BG3 Gr2 Importer/Exporter by Norbyte (divine.exe is included in LSLib!)
My simple Wrap template
NOTE 1: You can click all images in this guide to enlarge them!
NOTE 2: This guide teaches how to do a replacer mod. There are templates and instructions how to add instead of replace stuff on Nexus!
1. Decide which vanilla game head you want to edit for yours. You can check the CC heads ingame and match them with their name in this resource by Padme4000. Note that this only goes to a certain beta update, so very few new heads are missing (such as mascTiefling head F).
For your decision, stuff like ears should matter the most, they can be changed but it's more tedious and this guide won't explain skeleton edits. For this example I will edit the second Tiefling head of body type 2 (masculine):

In the reference based on visuals I identified it as TIF_M_Head_B.gr2:

The game files can be a bit confusing about where things are stored. Head meshes are often in
Generated\Public\Shared\Assets\Characters\_Anims\
So our Tiefling head mesh is in
Generated\Public\Shared\Assets\Characters\_Anims\Tieflings\_Male\Resources\TIF_M_NKD_Head_B.GR2
2. The first thing you do now to create a simple replacer is to rebuild this file structure inside your Baldur's Gate 3 game folder's 'Data' folder. So that you end up with a path like this:
Baldurs Gate 3\Data\Generated\Public\Shared\Assets\Characters\_Anims\Tieflings\_Male\Resources\TIF_M_NKD_Head_B.GR2
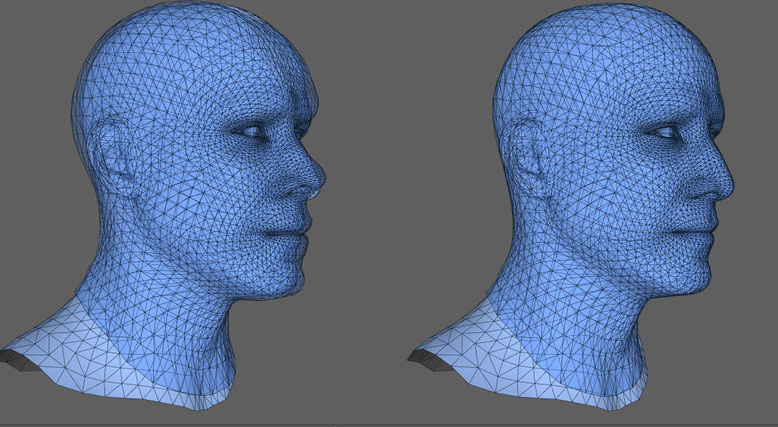
3. Now import the gr2 file you just created in the game's folder structure into Blender using the GR2 script from the requirements. You will notice the ears are on the floor, simply select them, press g and hit esc. We will do extra steps on them later.
For a bit of a cleaner workplace you should hide all the LOD meshes in the outliner list.

4. Next, import the head you want to see ingame. In this example I use Johnny Silverhand from Cyberpunk 2077. You only need the head mesh, no extras like teeth, eyes, lashes, etc. After importing, flip this head on the x axis and also rotate it to face the way as the BG3 one.
BG3 heads are x mirrored in blender!
Align the non-bg3 head to the tiefling base. Try to scale it within the bounds of the BG3 head, pay the most attention to the eye position and make it match as good as you can (to avoid eyes popping out). The mouth should also not be that far off, but it has more room than the eyes. Pay no attention to ears and neck really.
5. On both the tiefling head and on the other head remove vertices by distance with a merge distance of 0.00001 m. NOT more!
6. Select the tiefling head and go to Eport> Wavefront (.obj) (legacy) NOT the other one! It must be legacy!
Choose these export settings, again very very important:

Repeat this for the tiefling eyelashes and also for the other head mesh you want to shape to. Name them so you will find them.
WRAP CONTROLS:
Hold alt and drag for rotation, mouse wheel or alt+rmb for zoom, alt+press mouse wheel for moving.
F to center on object.
7. Open Wrap and load my template file. Click on the Base_Head node and load your tiefling head obj file:

Repeat for the other obj files:
Shape_Head in this example Johnny's head obj
Load_Lashes = the Tiefling eyelashes obj
8. Click on the FastWrapping node and press the compute button. It should wrap the tiefling mesh to Johnny's:
Looks decent enough, but you may want to do some tweaks. Press Viewport3D in the top toolbar to get a better view on just the new morphed tiefling head. You can toggle the og Johnny mesh for comparison by clicking the little lightbulb.

There will always be some difference, simply because of different polygon count and topology. But let's say you want to match certain points closer, eg lip shape.
7. Switch back to Visual Editor and click the SelectPointPairs node. This should show both base heads side by side. You can now click to set points where the program will snap the geom together. Add a few for the lips for eg:

If you compute FastWrapping now you can see that the morphed head is closer to the original shape.

8. Click the Save_Head node and enter a path and filename for your morphed mesh obj name. Do the same with the Save_Lashes one. The eyelashes were automatically refit with the og head mesh and will fit perfectly to the new morphed one. Once both are saved, head back to blender.
9. Hide the non-bg3 head, then use File>Import>Wavefront (obj) (Legacy) and choose these settings to import the morphed head obj. Keep vert order is VERY important!

Why is keeping vertex order so important?
We will use shape keys to keep all the weights intact and save a ton of work. Shape keys require the exact same vertex count and also order inside the file to be identical! Keep vertex order does exactly this and Wrap keeps it intact too.
Once imported, make sure the moprhed head from obj is selected only and press r,x,-90 and confirm it. The head will lie front facing on the ground, that's fine and wanted here. Do ctrl+a to apply all transforms on the mesh.

10. Select the head on the floor first, then the og tiefling head and head to the Shape key section. Do 'Join as Shapes' and you will get a new shapekey, this will be the same as the obj one. Having it back on the original mesh means all the weights, vertex colors and whatnot are intact! Additionally you keep the textures and UVs from BG3.

11. Now, you will be quick to notice that the neck seam shifts along with clipping on the haircap and also the messed up ear borders. We have to fix this by excluding these areas from the morph. Tieflings also have the horn attachment area which needs to stay the same to avoid gaps.
The solution is a limiting vertex group (yepp they aren't just for weights). So, create a new empty vertex group on the head, i just keep the default 'Group' name, it doesn't matter.

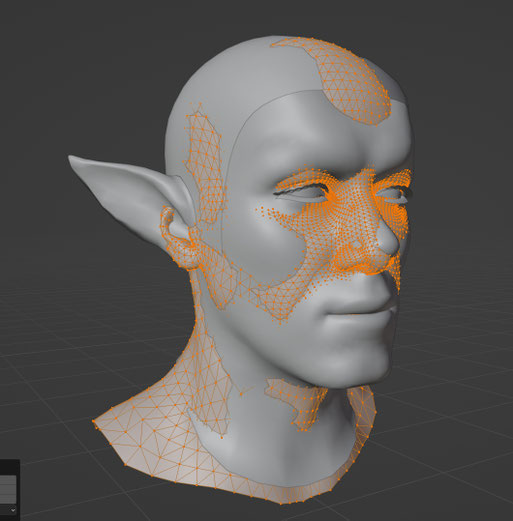
Switch into edit mode and set the viewport to a clear side view (NUM 3). Toggle xray to select verts on all sides and then draw a circle select over the face area only (c). Click 'Assign' to assign these selected verts the new 'Group'.

However, entering weight paint mode, you will see this group is very rough and ugly:

So Go to weights>Smooth and make sure to just smooth the ACTIVE group (otherwise you ruin the weights):

To limit your morph to the group, simply select it here where it says vertex group. You will see now that only the area painted with the 'group' weight will be affected by the morph, and neck seam is untouched!

CLEAN UP:
These two steps are clean up for the group. First, go into edit mode, select>All by Trait> Non Manifold. This will only select vertices at seams (non-welded). For your head it should be ear and neck seams. Click the remove button here to remove all influence of the 'Group' from these. This will 100% assure there won't be unwanted ear seams and the like.

Use a radial weight gradient set to 0 weight to restore the tiefling forehead area for the horns:
12. Don't apply the key just yet, we will use it to refit all the extra meshes easily (except lashes). Select for eg the eyeshadow mesh (here TIF_M_NKD_Head_B_Eyeshadow_Mesh) and head to the Modfier tab. Add a Surface Deform one and set the Target mesh to the head one (here: TIF_M_NKD_Head_B_Mesh).
Before you click 'Bind' make sure the morph is set to 0 on the head mesh!

13. To easily get the same modifier settings to all the other meshes, select the LODs, the scalp and tearline stuff first in the list. Then LAST select the eyeshadow mesh. In the modifier click Copy to Selected to well... copy it to all the selected meshes.
Do not select: Teeth, Ears, Eyeballs, Eyelashes

Then click through all these meshes separately and click 'Bind' in the Modfier.
Once done, select the head with the shapekey and set it to 1 for full activation. You will see all the other meshes will follow it now!
Leave it enabled, go through all the meshes again and apply (ctrl+a while cursor over surface deform modifier) all the modifiers to bake the mesh shape.
When that is done, select the head and in the shape key options, do 'Apply all shapekeys'. This will apply the activated morph as the new shape of the head.
Important! DELETE the 'group' vertex group we had created to limit the morph now!
14. For the eyelashes, repeat the steps to apply the head morph from the obj file, but skip all the vertex group limiting etc afterwards. You can immediately apply it.
The eyeballs have to be fit manually! Refit them so that they are behind the shadow and tearline meshes, but not too far inside the head. I use the curvature of the iris topology as orientation for placing them but you can also apply textures to help.

15. A last step to assure ears will not bug ingame: Select all ear meshes, then the Armature and press ctrl+p. This will add the modifier to them correctly.

They also need the Head_M vertex group for weighting, so add it easily using edit mode.

Last but not least: Select all ear meshes and r,x,-90 them too so they lie on the ground just as they were when you originally imported the head. Ctrl+a to apply this transform!

16. Export to GR2 using the exporter for DOS2/BG3. You can do it on whole scene or just selected items. However you do it, make sure you ONLY export the meshes and skel related to the bg3 head! Overwrite the gr2 in your game folder structure.
17. Test ingame and if it all done correctly, your head replacement works fine!

TEXTURES:
May or may not add some stuff later, but anyway. BG3 doesn't use diffuses for skin at all. If you want to add some stuff like moles, beard stubble, some darkening you can edit the Green color channel of the HMVY map. The green channel has details that get multiplied sorta over the rest of the material.
Refer to the CC guide linked above for info about the other color channels.
Textures for tieflings are in the folder:
Generated\Public\Shared\Assets\Characters\_Models\Tieflings\TIF_M_NKD\
You can follow the same pattern for other races to find the stuff you need for your head!
Ayyy you made it to the end of the guide! I hope it all worked out for you <3 Happy modding!